
How to connect two or more Windows PCs
Connecting two PCs together to exchange files is quite simple today, both because modern Windows systems provide all the tools to easily configure connections, and because you can use the home wifi network to be able to share the resources of all computers to use them. as if they were in every computer. In this article you will find how to connect two or more PCs with different methods.
Connect two PCs via crossover network cable
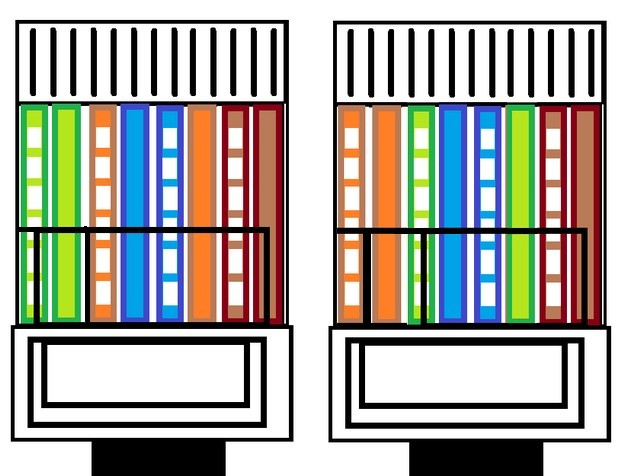
Let's start by saying that there are several ways to connect two PCs, one of which is to use a crossover network cable between two computers with a network card. Crossover network cables are readily available at electronics stores or on the Web. This type of cable is easily recognized by the colors of the wires that are inside the plug. In fact, if the colors of the two plugs at the ends of the cable are different, the cable is a crossed network cable. Otherwise you have a straight cable that is used to connect multiple PCs to a network via a router.
Now that you know the type of cable to use, let's see together how to connect two PCs with Windows. The first thing you need to do is to assign a static IP address to your computers by following the steps below:
-
Windows XP:
-
Windows 7 / Windows Vista:
-
Windows 8:
-
Windows 10:
With this operating system, you can assign a static IP address by clicking on Start > Control panel > Network and Internet Connections, select Network Connections, right-click on Local Area Connection (LAN) and from the menu that appears go to Properties.
To assign a static IP click on Start > Control Panel, select View network status and activity, click on Change adapter settings in the left sidebar and right-click on Local Area Connection (LAN). At this point, from the menu that appears, select Properties.
To assign a Static IP, click on Start and type in the search field view network activity and status by selecting the first result that is shown to you. In the left sidebar go to Change board settings and with the right mouse button click on Ethernet. From the menu that appears, select Properties.
With this operating system you can assign an IP address static by typing in the search field next to Start, view network activity and status and then pressing Enter on the PC keyboard. In the left sidebar click on Change adapter settings and with the right mouse button go to Ethernet. From the menu that appears, select Properties.
At this point, the window that opens is common to all operating systems. Scroll through the menu The connection uses the following items and double-click Internet Protocol Version 4 (TCP / IPv4) to enter the computer's network properties. Put the check mark next to Use the following IP address: and in the field next to IP address: type the address you want to assign to the computer. Remember that each computer must have a different IP address ending (eg 192.168.1.2 for the first PC and 192.168.1.3 for the second PC).
As for the Subnet mask: item, this value it is assigned automatically for all PCs and is 255.255.255.0. In the field next to Default gateway: type the address of the router you use to connect to the Internet. The Default DNS Server: and Alternate DNS Server: fields are left blank. Once the configuration is complete, click on Apply first and then on OK to save the settings.
To complete the procedure, you must connect the two PCs by giving the computer a name and making sure that both computers are part of the same group of work. The workgroup must be called the same on both PCs otherwise the network will not work. On Windows XP it is called MSHOME while on Windows Vista, Windows 7, Windows 8 and Windows 10 it is called WORKGROUP. So, if you have to establish a network between two PCs with the same operating systems you don't have to do anything, otherwise if you use two PCs with different operating systems, you have to change the name of the workgroup on one of the two computers so that they both use the same group workgroup.
To assign the name to the PC and change the name of the workgroup on Windows XP, click on the Start button, right-click on Computer and from the menu that appears click on Properties. In the window that opens, click first on Computer name, then on Change and type the computer and workgroup names in the Computer name (write whatever you want) and Workgroup (change it only if you need to create a network between different operating systems) fields). Save the settings by clicking on OK.
To assign a name to the PC and change the name of the workgroup on Windows Vista, Windows 7, Windows 8 and Windows 10 click on File Explorer in the taskbar, click with right click on the Computer icon In the left sidebar and then from the menu that shows you the Properties item. In the window that opens, click first on the Change settings item at the bottom right and then on Change Type the computer and workgroup names you wish to adopt in the appropriate fields and click on the OK button twice consecutively.
Now you need to enable network resource sharing and you will have your two PCs connected. If you are using Windows XP, open any folder to start Windows Explorer and click on Folder Options in the Tools menu. In the window that opens click on the View tab, scroll down the Advanced Settings menu and put the check mark next to Use simple file sharing. Save settings with Apply > OK.
If you are using Windows versions 7 onwards, go to Start > Control panel > Network and Internet. Select Network and Sharing Center and click Change advanced sharing settings in the left sidebar. In the window that opens, expand the section Home or work or Private (depending on the version of the operating system), put the check mark next to the items Enable network discovery and Enable file and printer sharing and then Disable password protected sharing, Use account and user password to connect to other computers and click on Save changes. In all cases, if you are asked to disconnect from the session to complete the operation, disconnect and log back into the system.
Now complete the operation of all the steps just seen also on the second PC to be connected to the network and remember to set a different IP address than the first PC, while all other values (including the name of the workgroup) must be the same as that of the first computer. The only exception is the name of the computer that you can call it whatever you want. Once the configuration is complete on both PCs, you can connect them together by inserting the plugs of the crossed network cable into the two ethernet ports of the computers. If you have performed all the steps correctly, the network is done.
To share a file or folder on the network on Windows XP, right-click on the folder to share and select Properties from the menu that appears . In the window that opens, click on Sharing and put the check mark next to Share this folder on the network - Allow network users to edit files. Save changes with Apply > OK.
To do the same thing on Windows Vista, Windows 7, 8 and 10, click with the right mouse button on the item you want to share and select Share with and from the menu that appears Specific users. In the window that opens, select Everyone from the drop-down menu and click on Share to complete everything.
To access folders and files shared on the network on Windows XP, right-click on Start and then on Explore in the menu that appears. In the window that opens, use the Network Neighborhood icon (at the bottom of the left sidebar) to view shared files and folders.
If you are using a newer version of Windows, start Windows Explorer o File Explorer by opening any folder and then first click on the arrow next to the Network item at the bottom of the left sidebar and on the name of the PC on the network whose files you want to view.
Connect two PCs via wireless network and WiFi router
In the case of a Wireless connection, the procedure is simpler, the computers to be connected must be networked to the same Wifi router.
The router assigns the IP addresses of the computers automatically and there is no need to set them statically.
Assign the same Workgroup or workgroup to the PCs to be connected.
To do this you need to open the Control Panel, go to the item, System and security, select System and click on Advanced system settings.
On the Computer name tab, click on Change to the option to change the group of work.
Next, name the two PCs and make sure they are both part of a workgroup with the same name. the Control Panel go to the System and security item then open System and press on Advanced system settings. At the Computer Name tab, click Change to the option to change the workgroup. Then assign a unique name to the two PCs and make sure that both are part of a workgroup with the same name. Make sure that the common network to which the two PCs connect is set as a private network, if in doubt, consult the article about it by clicking here .
Now you need to enable network file sharing.
Once again open the Control Panel